Macro Photography Made Easy: A Beginner’s Guide
- Jan 17, 2024
- 4 min read
Updated: Oct 11, 2024
Welcome to the world of macro photography, a realm where the smallest details are brought into striking focus. This guide is designed to introduce beginners to the art of capturing the tiny wonders that surround us, from the intricate patterns on a leaf to the delicate textures of a flower petal. We aim to demystify this form of photography, making it accessible and engaging for newcomers. Here, you'll discover the essential equipment, techniques, and tips needed to embark on your macro photography journey.
Photo by channah on FreeImages.com
What is Macro Photography?
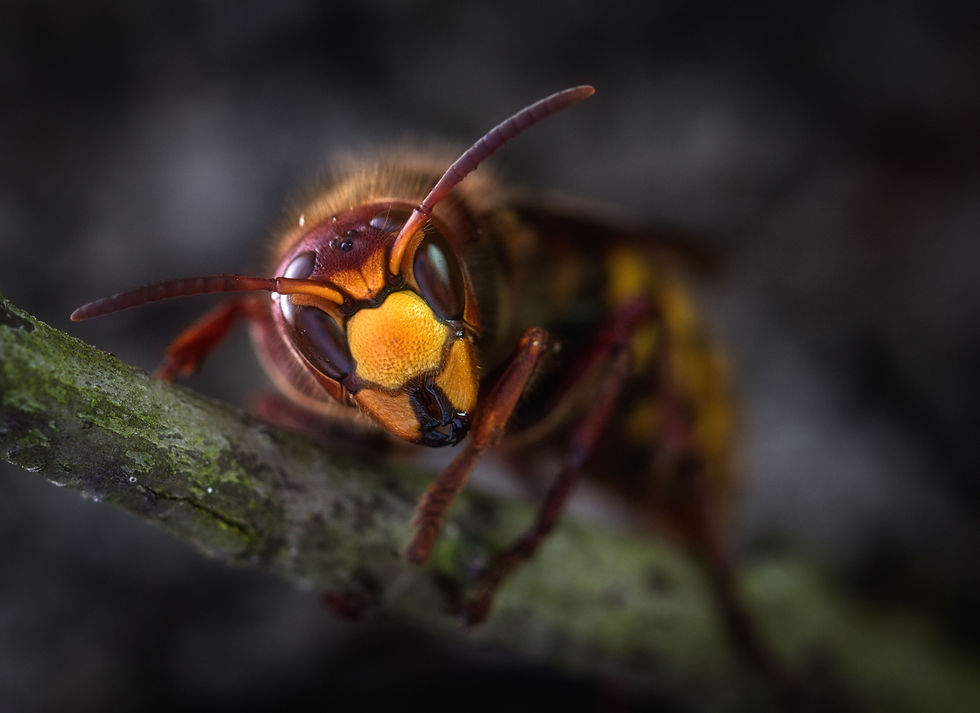
Macro photography is akin to using a magnifying glass with your camera. It involves taking extremely close-up pictures of small subjects, such as bugs, flowers, or tiny objects, to make them appear much larger in the photograph. It is similar to zooming in closely to see all the small details that are typically invisible to the naked eye.
Macro photography involves taking extremely close-up pictures of small subjects, such as bugs, flowers, or tiny objects, to make them appear much larger in the photograph.
In macro photography, the tiny subject gets magnified so it fills up more of your photo, showing off details that are often missed. This type of photography is great for exploring the little things in life and capturing their beauty in a big way.
Tips for Macro Photography
Tip 1: Choosing Your Equipment
Macro Lens: The heart of macro photography is a dedicated macro lens. These lenses, optimized for close focusing, are indispensable for true macro photography.
Alternatives: If a macro lens is beyond your budget, consider using extension tubes or close-up filters.
Tripod: Avoid camera shake, a common problem in macro photography. Use a tripod, or, if shooting handheld, stabilize your camera against a solid surface. Remote shutter releases or timed shutter settings can also help reduce camera shake.
Photo by hummel_13 on FreeImages.com
Tip 2: Lighting Your Subject
Natural Light: While natural light can create beautiful images, its unpredictability can be challenging.
Artificial Light: A flash or an LED ring light can provide consistent and controllable lighting. Soft, diffused light is ideal because it reduces harsh shadows and evenly illuminates your subject.
Tip 3: Mastering Focus
Given the shallow depth of field typical in macro photography, precise focusing is crucial. Manual focus gives you more control, allowing you to pinpoint exactly where you want the sharpness. Using a narrower aperture (higher f-number) increases the depth of field, bringing more of your subject into focus.
Photo by umsiedlungen on FreeImages.com
Tip 4: Composition and Framing
Composition in macro photography is as vital as in other photography forms. The rule of thirds, leading lines, and framing can all be used effectively. Experiment with different angles to find the most compelling way to present your subject.
Tip 5: Patience and Persistence
Macro photography often requires waiting for the perfect shot, particularly with unpredictable subjects such as insects. Patience is your ally here. Take your time to set up the shot and wait for the right moment.
Tip 6: Practice and Experimentation
The more you practice, the better you will understand the intricacies of macro photography. Experiment with various subjects, settings, and lighting conditions. Every failed shot is a step toward a successful one.
Photo by KatyPat on FreeImages.com
Tip 7: Post-Processing Techniques
Post-processing is a powerful tool in macro photography. Learning how to crop, adjust exposure, and apply sharpening can turn a good photo into a great one.
Tip 8: Embracing the Learning Curve
Macro photography can be challenging, but every obstacle is an opportunity to learn. Do not be discouraged by initial setbacks. Each attempt provides valuable lessons.
Tip 9: Understanding Your Subjects
If you are photographing nature, having a basic understanding of your subjects can be immensely helpful. Knowing where to find certain insects or how flowers bloom can aid in planning your shoots.
Photo by alitaylor on FreeImages.com
Tip 10: Exploring Different Environments
Do not limit yourself to your backyard. Explore different environments like parks, forests, and gardens. Each environment provides unique subjects and lighting conditions.
Tip 11: The Importance of Background
The background can make or break a macro photograph. A cluttered background can distract from your subject, so aim for simplicity. Sometimes, slightly adjusting your camera can significantly improve the background.
Photo by kromo on FreeImages.com
Tip 12: Using Manual Settings
While automatic settings can be helpful, manual settings offer more control. Adjusting ISO, aperture, and shutter speed manually can lead to better and more consistent results.
Tip 13: The Magic of Water Droplets
Incorporate water droplets into your shots to add magic. They can act like miniature lenses, adding an element of fascination to your photographs.
Photo by vancanjay on FreeImages.com
Tip 14: Keeping Your Gear Clean
In macro photography, even a small speck of dust can be noticeable. Keep your lens clean and check it regularly, especially when shooting outdoors.
Tip 15: Utilizing Image Stacking
Image stacking is a technique where you take multiple photos with different focus points and then blend them together. This can create an image with more of the subject in focus.
Macro photography is a fascinating way to explore and capture the world's hidden details. It's about bringing the small and often unnoticed to the forefront, revealing the beauty and complexity of tiny subjects. As a beginner, diving into macro photography can be an exciting adventure, full of discoveries and learning opportunities. With patience, practice, and the right approach, you can transform the miniature world around you into stunning photographs. Thus, grab your camera, get close, and begin to see the big picture in the smallest things!


