Patterns and Textures in Photography: How to Find and Shoot Them
- Jan 24, 2024
- 10 min read
Updated: Apr 1
In photography, the most memorable images are often built on details most people walk right past. A weathered wall. A tiled floor seen from above. A stack of terracotta pots at a market. Patterns and textures are everywhere, and once you start noticing them, you cannot stop.
This guide is for photographers who want to move beyond just finding patterns and textures, and start using them deliberately to build stronger, more emotionally resonant images.

Photo by captainame on FreeImages.com
Pattern and Texture in Photography:
What is a pattern in photography?

Photo by AK_RD44 on FreeImages.com
A pattern in photography is the repetition of an element within the frame. It can be geometric shapes, a row of identical windows on a building, the spacing of trees along an avenue, or the arrangement of tiles on a floor. Patterns give an image rhythm. They guide the viewer's eye across the frame and create a visual expectation.
That expectation is where things get interesting. You can satisfy it by presenting a perfectly repeating pattern, or you can break it, which immediately creates tension and a natural focal point.
Patterns can be natural or man-made, tight or loose, rigid or organic. The most compelling pattern shots tend to have something that prevents them from feeling like a simple document of repetition.
A pattern in photography is characterized by the repetition of a certain element within the frame.


What is a texture in photography?

Photo by Lyris on FreeImages.com
Texture in photography is the visual representation of surface quality. It is what makes a photograph feel tactile. A rough stone wall, the nap of a velvet cloth, the grain of weathered wood: these are all textures, and when captured well, they trigger something physical in the viewer.
Texture in photography refers to the perceived surface quality or 'feel' of an object within the photographic frame.
The key phrase is "captured well." Texture is almost entirely dependent on light. The same brick wall can look completely flat under overcast midday light and richly three-dimensional under late afternoon sun hitting it from the side. Lighting angle is often more important than the subject itself when it comes to texture photography.


The importance of patterns and textures in photography
Patterns and textures are among the most reliable tools for transforming an ordinary scene into a photograph worth stopping at. They add visual complexity without requiring elaborate subjects or setups. They invite viewers to look closer, and when used with intention, they can shift the entire mood of an image.
A rough, irregular texture feels raw and unfinished. A smooth, repeating geometric pattern feels precise and ordered. The emotional language of surfaces is something photographers learn to read over time, and then learn to write with deliberately.
Patterns Photography
Natural vs Man-Made Patterns
Not all patterns behave the same way in front of a camera, and knowing which kind you are looking at changes how you shoot it:
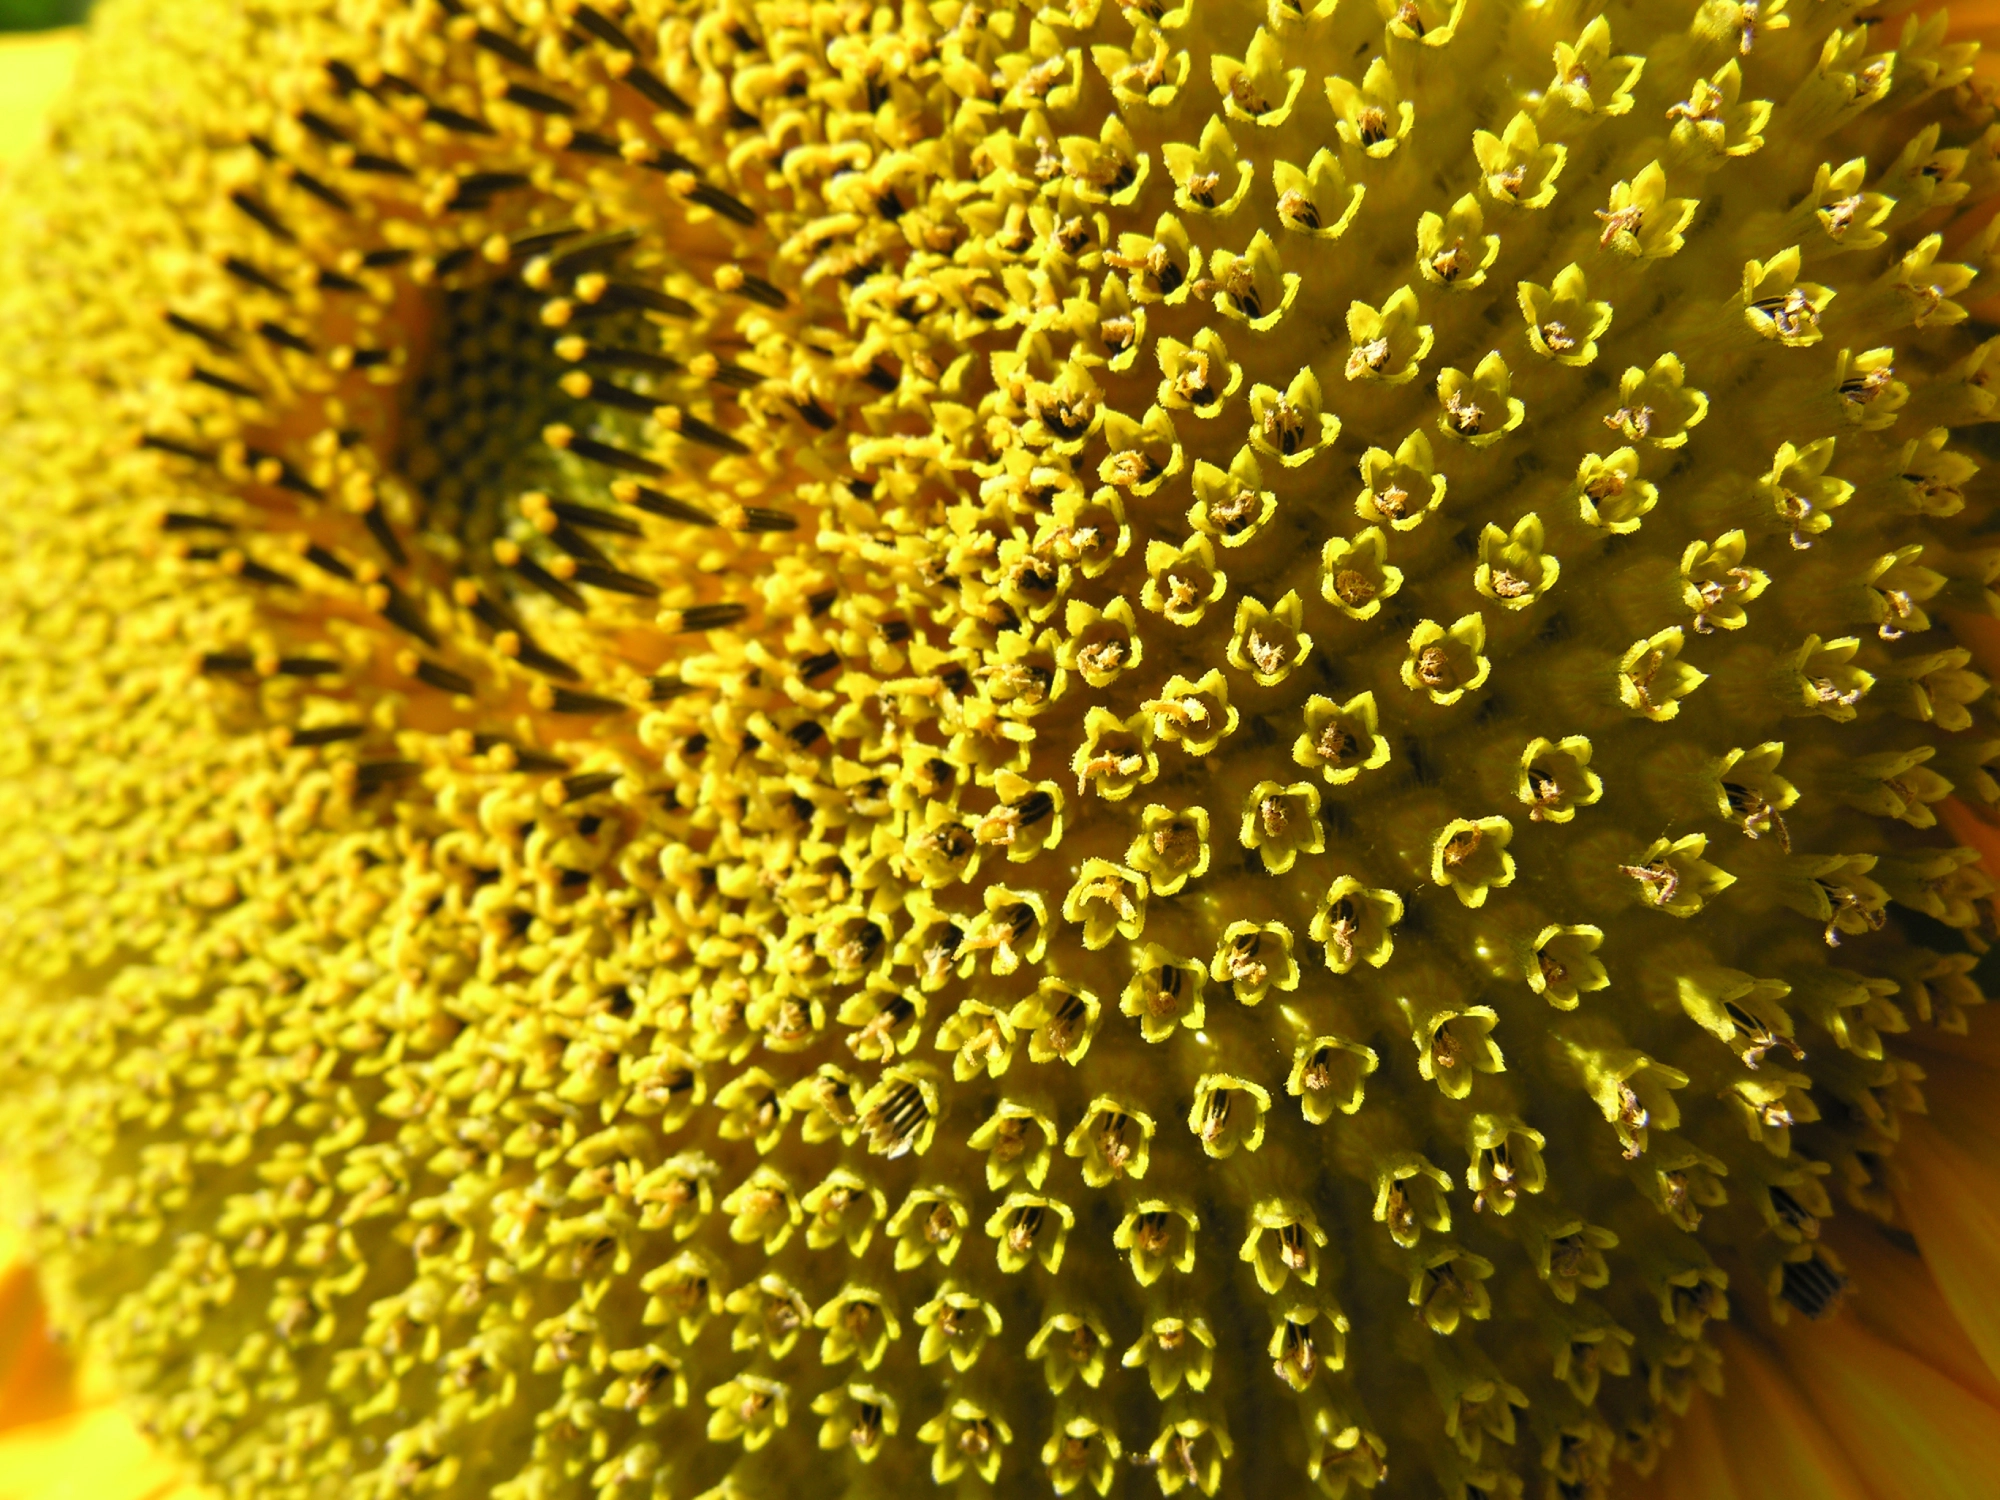
Natural patterns follow a logic, but it is nature's logic. Ripples spreading from a stone dropped in still water. The spiraling arrangement of seeds in a sunflower head. Cracks in dry clay. Branching roots. There is always a slight irregularity, a variation that keeps them from feeling mechanical. That imperfection is often what makes them compelling. A single broken spiral in a shell, one leaf slightly out of alignment with the rest: small inconsistencies are what the eye naturally seeks out.
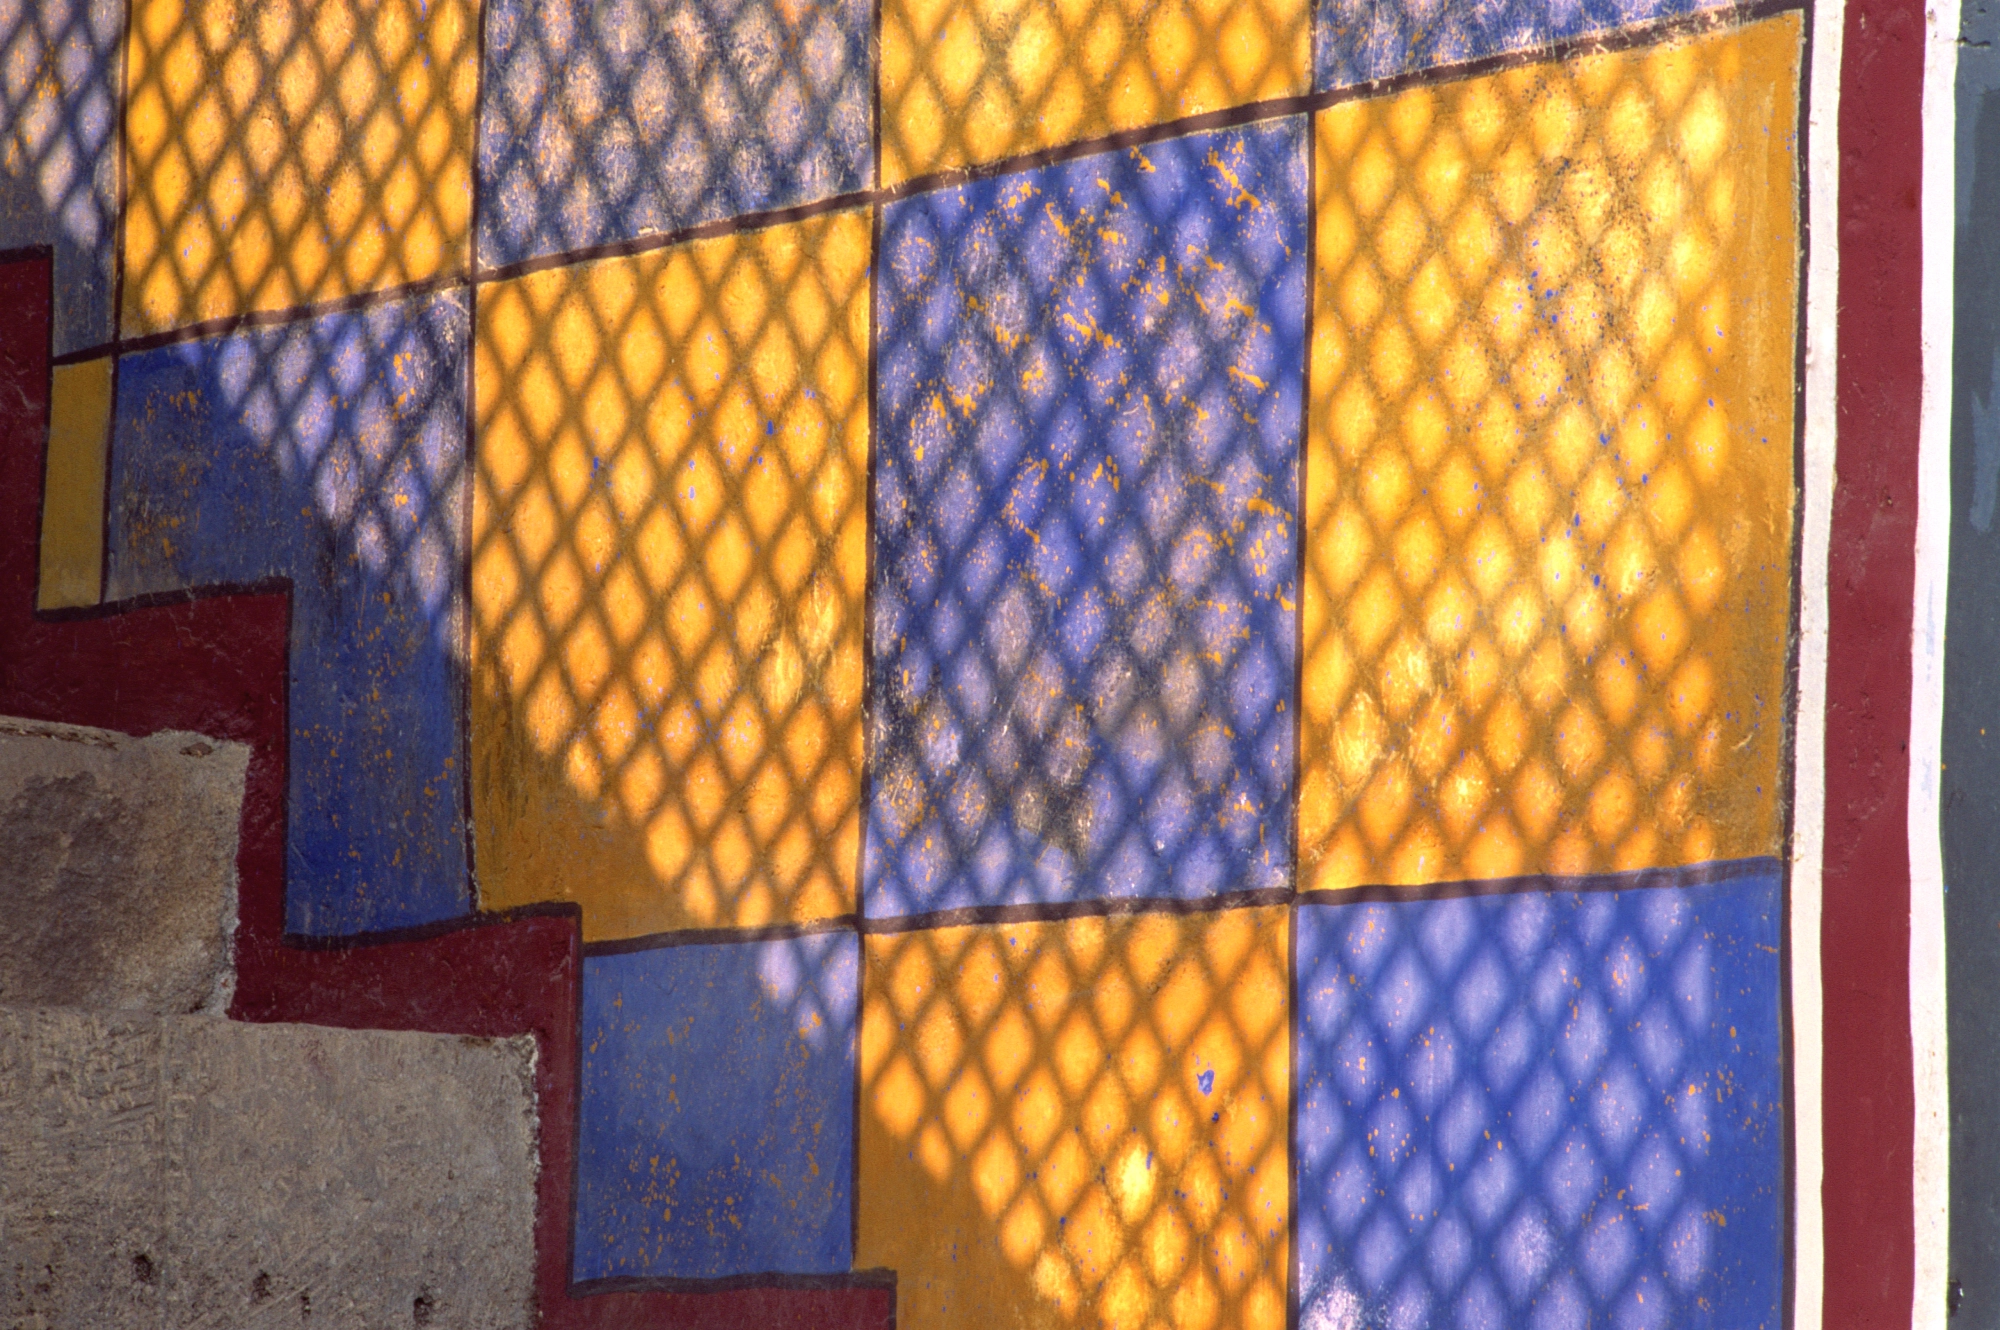
Man-made patterns work differently. A building facade, a tiled floor, a textile weave, scaffolding grids: the repetition is intentional and precise. That regularity works in your favor when you fill the frame completely, because viewers instinctively search for breaks or flaws in a strict pattern, even when there are none.
The practical difference when shooting: with natural patterns, getting close and slightly off-axis often produces stronger results than shooting straight on, because you preserve the sense of organic flow. With man-made patterns, a centered, head-on composition tends to feel more powerful since the geometry carries the visual weight.
Some of the most interesting pattern shots mix both. A glass building facade covered in climbing ivy. Cobblestones worn uneven by years of foot traffic. The structure is man-made; the texture and variation are entirely natural.
Identifying patterns in the mundane
The first step in working with patterns is developing an eye for them before you even raise the camera. Patterns are in nature, in architecture, in everyday objects. The key is observing your surroundings with fresh attention rather than habitual sight. Look for repetitions and alignments: window grids, stacked containers, rows of parked bikes, fence posts, floor markings.
Repeating patterns are also closely connected to symmetry in photography: understanding one sharpens your ability to see the other.

Photo by LMorris2 on FreeImages.com
Breaking the pattern
Occasionally, the disruption within a pattern serves as its most compelling aspect, creating a focal point and adding a layer of intrigue to your image. This can be a different colored tile in a uniformly tiled floor or a single wilting flower in a bed of blooming ones.

Photo by carterboy on FreeImages.com
Texture in photography
How to photograph textures
Textures are built from details, and details need the right light to reveal themselves. Side lighting is the most reliable approach: light hitting a surface at a low angle creates shadows that trace every ridge, groove, and irregularity. This is why late afternoon and early morning light works so well for texture photography outdoors. The sun is low, the shadows are long, and surfaces that looked flat at noon suddenly have depth.
When shooting indoors, you can replicate this with a single off-camera light source. Move it around until you see the surface come alive in your viewfinder.

Photo by MK on FreeImages.com
Macro photography for textures
Macro photography opens up a completely different category of texture work. Up close, the bark of a tree becomes a landscape. A piece of burlap looks architectural. The weave of a woolen sweater turns into something almost geological.
The advantage of macro for texture is that the subject's identity almost disappears. Viewers see the surface quality, not the object. This shift is what makes macro texture shots visually absorbing: they become about the pattern within the texture rather than the thing itself. A detail that reads as "leather jacket" from a meter away becomes pure surface and shadow at 1:1 magnification.

Photo by connor212 on FreeImages.com
Depth of field and textures
A wide aperture (f/1.8 or f/2.8) isolates the texture from its background, drawing full attention to the surface you are shooting. This works well when the texture is the entire point of the image.
A narrow aperture (f/11 or f/16) keeps more of the scene in focus, contextualizing the texture within its environment. If you are shooting the side of an old stone building, a smaller aperture shows both the close surface detail and the wider scene it belongs to. Neither is better in absolute terms: the choice depends on whether you want the texture to be the whole story or part of one.

Photo by photograin on FreeImages.com
Patterns and textures in photography: how they work together
Combining patterns and textures in photography
Patterns provide structure. Textures provide depth. Together they build images that reward attention, where looking longer reveals more.
A cobblestone street works because the stones form a pattern (the repetition of shape and spacing) and each stone carries its own texture (worn, rough, slightly different from the one beside it). Neither element alone would create the same result.
Patterns and textures photography works across genres, from macro photography to landscapes. For a more stripped-back approach, see how minimalist photography uses a single texture as the sole visual element.
Creating semi-abstract images
When pattern and texture take over the frame completely, the image can shift into semi-abstract territory. The subject becomes secondary. What the viewer experiences is shape, rhythm, and surface quality rather than a specific object or place.
Finding this balance takes practice. Too much pattern can feel cold and decorative. Too much texture without structure can feel formless. The strongest semi-abstract shots tend to have one dominant element and one secondary element that complements without competing.

Photo by andrewatla on FreeImages.com
The role of color and monochrome
Color can strengthen or weaken a pattern depending on how the palette works. High contrast colors make patterns pop. When too many colors compete within a frame, the repetition itself can get lost in the visual noise.
Black and white is particularly effective for texture work. Removing color forces the viewer to focus on surface quality, light, and shadow alone. It also tends to unify images that felt visually busy in color. If a texture photograph is not quite working in color, try converting it to monochrome before abandoning it.

Photo by rburress on Freeimages.com
Emotional impact
Patterns and textures carry emotional weight that is easy to underestimate. A smooth, repeating geometric pattern feels ordered and calm. Rough, irregular textures feel raw or weathered. Warm surfaces like wood or fabric read as comfortable and familiar. Cold hard surfaces like metal or glass feel stark and impersonal.
Being aware of these associations gives you more control over how a viewer feels when they look at your image. The surface of your subject is not a neutral choice.

Tips for beginner photographers
Start with your surroundings
You do not need to travel to find compelling patterns and textures. The wall you walk past every day, the surface of your desk, the floor of a parking structure: these all have material worth photographing. Familiarity tends to make us stop seeing things. Treating known environments as if you are seeing them for the first time is the core skill in this kind of photography.

Photo by cempey on FreeImages.com
Choosing the right lens
Choosing the right lens can have a significant impact on capturing textures and patterns. For instance, a macro lens works beautifully for shooting fine details up close; think of the delicate lines on a flower petal or the rugged surface of tree bark. In contrast, a wide-angle lens is perfect for capturing larger, more expansive patterns, such as architectural structures or vast landscapes.
Prime lenses with fast apertures are also excellent tools for highlighting textures. By allowing you to blur the background, they help isolate the subject, drawing even more attention to the texture itself.

Photo by niksan on FreeImages.com
Experiment with lighting
Lighting is not a secondary decision in texture and pattern photography: it is often the most important one. Without the right light, even the most intricate textures can appear flat.
For texture work, directional light from the side or at a low angle is most effective. It creates shadows that trace surface details and make them appear three-dimensional. Shooting the same rough wall at noon and at 5pm will give you two completely different photographs.
For pattern photography, softer and more even light is often better. It allows the repetition of shapes to read clearly without harsh shadows cutting across the frame and creating visual noise. That said, experimenting with backlighting or strong side light on patterns can produce striking results depending on the subject.

Photo by dlritter on FreeImages.com
Play with Composition
Once you spot a pattern or texture, think carefully about your composition. Experiment with angles and perspectives, and pay close attention to how light interacts with the surface you are capturing.
Some suggestions for stronger compositions:
Fill the frame: To emphasize repeating patterns or highlight the fine details of a texture, consider filling the entire frame. This approach brings attention to their intricacies and removes distracting context.
Look for contrast: Combining different textures or patterns introduces contrast, adding depth. Pairing a rough texture with a smooth one creates visual tension.
Use negative space: Contrasting a rich texture or pattern against an empty area can make it far more striking. Learn more in Understanding and Using Negative Space.
Break the pattern: A single unexpected element in a repetitive pattern draws the viewer's eye immediately and adds intrigue.
Use leading lines: Many patterns form natural lines that guide the viewer's gaze through the image toward your intended focal point.

Photo by windys on FreeImages.com
Post-Processing
Post-processing can significantly strengthen both texture and pattern work. Increasing contrast makes textures feel more pronounced, bringing out the difference between highlights and shadows on a surface. The Clarity and Texture sliders in Lightroom add micro-contrast that pulls surface detail forward. Sharpening helps edges in pattern work read crisply.
For pattern images, cropping is often the most useful post-processing decision. Tightening the frame removes distracting elements at the edges and reinforces the repetition. A slight rotation to align the pattern with the frame edges can also give a more deliberate, composed feeling.ments can also strengthen the pattern and ensure that it is the focal point of the image.

Photo by ilco on FreeImages.com
FAQ
How can I capture textures in photography?
Capturing textures in photography requires good lighting, particularly side lighting, which emphasizes the surface details by creating shadows and highlights.
What camera settings are best for texture photography?
A smaller aperture (higher f-stop) can help bring out details in textures by ensuring that more of the image is in focus.
Where can I find patterns for photography?
Patterns can be found everywhere, from natural elements like leaves and flowers to man-made structures like buildings and fences.
How do patterns and textures enhance photography?
Patterns and textures add depth, interest, and visual appeal to images, guiding the viewer’s eye and evoking sensory experiences.
What is the role of contrast in texture photography?
Contrast helps to bring out the details in textures, making rough surfaces appear rougher and smooth surfaces appear smoother.
Can I combine patterns and textures in a single image?
Yes, combining patterns and textures can create visually complex and engaging images, particularly when using contrasting elements to add interest.
What is the difference between pattern and texture in photography?
Patterns are created by repeating shapes, colors, or objects, giving an image rhythm and balance. Textures focus on the surface details that make a photo feel tactile and realistic. Patterns appeal to the eye’s sense of order, while textures appeal to the sense of touch.


Learning to see patterns and textures changes how you move through the world. Once the habit forms, ordinary spaces start revealing structure and surface detail that was always there but invisible before. Your surroundings become a library of photographic possibilities. The patterns and textures are already in front of you: the camera just gives you a reason to look more closely.
📸 Download free texture and background photos on FreeImages: perfect for graphic design, web projects, and creative work.